|

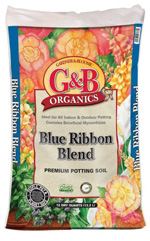
 Helps produce more abundant, better tasting and more nutritious vegetables.  An exceptional potting soil for indoor and outdoor containers. 
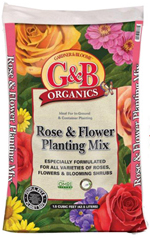
 Ideal for a variety of in-ground and container planting. |
 |
FEATURED QUOTE: "A garden is always a series of losses set against a few triumphs, like life itself." |
 |
Pre-order your 2020 roses before Sunday, 12/8/2019 and enjoy 10% off the listed price.
|
 |
|
We are closed on Thanksgiving Day to celebrate with our families and friends. H & H Nursery would like to wish everyone a Happy Thanksgiving.
Some Fun Thanksgiving Facts for You:
|

|
With the onset of winter, even gardeners in relatively warm winter climates have a tendency to pull the covers over their heads, and hunker down until spring beckons. But our zone allows us to appreciate the beauty and colors of many winter-friendly plants, even if we're viewing them through the windows of our cozy, warm homes! Camellias are easy-care evergreen shrubs with dark green, glossy foliage that do not require much pruning and look great year-round. When thinking of Camellias, most people visualize Camellia japonica, a beloved shrub that provides beautiful flowers in a wide array of (mostly) pastel colors in early spring. The winter-blooming Camellias are Camellia sasanqua, beautiful shrubs that provide masses of blooms in white, pink or red during the fall and winter. Strategically choose an early, mid-season or late variety to provide color when you'd like to see it, or plant a mix of different varieties for an extended season of bloom. Don't have any garden space? Camellias make excellent container plants for the patio, porch or deck! All varieties of Camellia sasanqua display a graceful, arching growth habit. Take advantage of its pliable branches and train it as a show-stopping espalier, or simply let it grow naturally as a single shrub, or use them in groupings under trees or in light shade. Depending on the variety chosen, Camellia sasanqua will grow slowly to a height of 4'-10' tall and spread 6'-8' wide. Some are low or mid-sized spreaders and some much larger, making these types good candidates for foundation planting. Because they are slow growing, they can be easily pruned to control their height and spread, but it is best to prune them naturally rather than in a more formal way (of course, wait until after the last blooms have dropped to shape them). Camellias like ample moisture, but must have good drainage. Their roots tend to spread out much farther than they go down, so when preparing the hole for planting them, dig it wider and just a little deeper than the rootball of the plant. They require an acid soil, so if your soil tends to be alkaline, make sure to use a generous amount of an shade plant mix in the planting hole. Lastly, position the plant so that the surrounding soil level will be about an inch below the top of the rootball (they like their roots high). Wait to fertilize them until after they have finished blooming, using a shade plant fertilizer. Camellias make excellent companions for plants such as azaleas, rhododendrons, hydrangeas, gardenias, ferns and Japanese maples. While they grow very well in light to medium shady areas, they will tolerate more sun than their later-blooming counterparts, making them a more versatile choice for the home garden. Unlike many plants, camellias are most dormant during the blooming season, so don't hesitate to plant them as soon as you get them home from the garden center, even when they are covered with flowers. Come in soon to see our great selection of Camellia sasanqua plants and add some winter color to your garden! |

|
If you're being awakened in the middle of the night to the sound of turned over garbage cans accompanied by high-pitched chirping sounds, chances are you've been paid a visit by those little bandits called raccoons. Raccoons are generally active at night, when they are most likely to raid your garbage area, looking for discarded fruit, vegetables, and anything else that might make a tasty snack. Their contact with humans is normally motivated by two basic things: food and/or shelter. Getting rid of raccoons starts with securing the sources of these temptations, and if that doesn't deter them, there are a few other alternatives. 
The key to keeping raccoons away is to make your home a less inviting place to visit. Keep your garbage cans sealed with bungee cords if stored outside, or store them in the garage or storage shed. Make sure all of your foundation and basement vents are in good shape and have no holes in them; otherwise, raccoons might nest under your home. If you have a dog or cat door into the garage, make sure not to store food or feed pets in there. If you have taken care of the basics, and the pesky critters still want to hang out, you might want to consider a few other options. There are a number of humane traps that will help you trap them live and allow you to transport them to a wooded area away from your home. Be careful, though, and wear thick gloves when handling traps, because raccoons will try to bite if agitated. Motion-sensing lights and sound devices will also help keep raccoons away. Nocturnal by nature, they don't like bright lights. You can also apply a raccoon repellent to garbage cans and around the yard to deter them. Many wildlife specialists use this method because the repellent uses the scent of a predator such as a coyote, wolf, or mountain lion to mark your garden as a predator's territory. So don't be kept up at night because raccoons are having a party at your house. Take action today and keep those raccoons away! Important Note: Two illnesses common to raccoons are distemper and rabies. If you see raccoons, keep your pets inside. Raccoons are primarily nocturnal, so if you see one in a populated area during the day, especially if it is acting strangely, be sure to avoid it and report it to a wildlife specialist. |
 |
|
Why don't people use cow manure as much nowadays? Answer: With the advent of so many great all-organic fertilizers, there's really no need to add manure to your garden. You can get much better and more balanced results with regular feedings of organic plant foods, without the manure. If you really want to use manure on (or near) your food garden, please use sterilized/composted manure. It's much safer than fresh, and doesn't have as much odor. |

What You'll Need: Graham Cracker Crust:
Filling:
Ganache:
Step by Step:
Yield: 8-10 servings |
 |
Written content © Garden Partners LLC, or respective authors. All Rights Reserved. Privacy Policy. All written content contained in this site is protected by United States copyright law and may not be reproduced, distributed, transmitted, displayed, published, or broadcast without prior written permission of Garden Partners, LLC. You may not alter or remove any trademark, copyright or other notice from copies of the content. |


