|

|
 |
Featured Quote: "The watering of a garden requires as much judgment as the seasoning of a soup." |
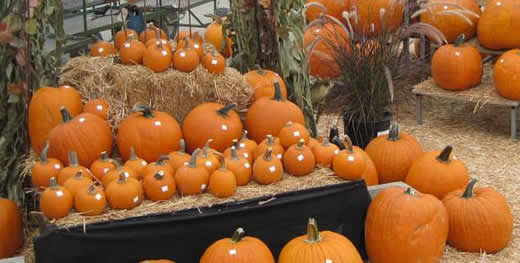
Pumpkins are Here!
|
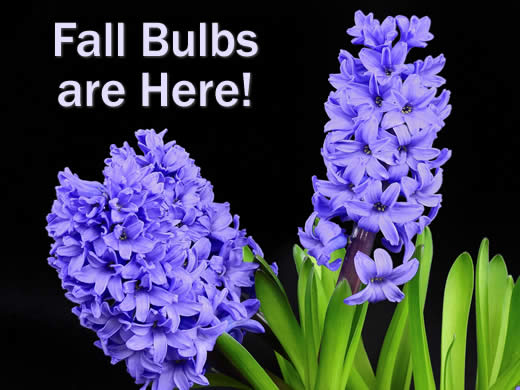
We have tulips, narcissus, hyacinths and bearded iris!
|
 |
|
One of the great mistakes many people make in Mediterranean-style landscape design is to incorporate plants that don't blend in with their natural surroundings. To make matters worse, the home owner (or the home owner's gardener) then prunes everything perfectly round or, worse yet, in geometric shapes--giving their home the look of a stage set from the movie Edward Scissorhands. A house needs to connect with its natural surroundings to feel truly at home. With a little planning you can select the right plants to not only blend your home with the wilder landscape around it but also to create a garden that stands up to the sun and reflects the best that its rays have to offer. The key is to soften plants with formal growing habits by pairing them with free-form shrubs, perennials and grasses. Most Mediterranean designs use Italian cypress, arborvitae, boxwood, laurel or yew (Taxus) to define the garden and give it some stature. Now consider house or garden walls that might be softened with the addition of a clinging vine such as Boston ivy or creeping fig. You could also incorporate grape vines on arbors, fences or pergolas. The next thing to do is introduce motion to your garden with the addition of ornamental grasses. Start with a few closer in the foreground and then consider planting groups of three or more as you move farther out. Ornamental grasses change with the season just like the ones that cover the hills, making them great transitional plants. They are wonderful at reflecting sunlight and many have attractive showy plumes that add another shape to the garden. To give the garden some more visual punch, plant flowering perennials that you might expect to find in a field, such as agastache, aster, coreopsis, gaillardia, geranium (species), lavender, rudbeckia, salvia, and veronica. For some extra color and movement also consider tall stemmed daylilies and statice (Limonium). Finally, for real standout color, consider adding roses to the landscape. You could create a formal hedge using a pure white rose, or just plant roses randomly throughout the landscape and let them blend in. Roses look great in Mediterranean gardens because it is natural to see roses at the end of grapevine rows throughout Tuscany. To help conserve water, make sure to cover your planted areas with some type of decorative mulch. To complete the look of your sun garden, consider adding a small-scale fountain water feature and some empty decorative glazed containers.
These will add style and form to the garden as well as reflect additional sunlight, sending rays of light throughout your new garden. |

|
Next to spring, fall can be the best time for some colorful action in the rose garden. While most modern hybrids do bloom through the summer, the bloom size tends to decrease substantially as a result of the high summer temperatures. As fall approaches, roses once again "come into their own," sporting some of the largest blooms seen since the previous spring. Take some time to enjoy this display, because all too soon, they will be entering their winter period of dormancy. Here are some fall tasks to help ensure your roses will remain healthy and ready to take off again next spring:
|

|
Summer vegetable gardening enthusiasts seem to out-number those that grow vegetables in the fall by quite a bit. We're not really sure why. Fall vegetable gardening has a lot of things going for it. The temperatures are not as hot, so the garden does not require as much water as it did in the summer; it's also much more pleasant to garden in the cooler weather. There are not as many pests and generally the weed growth is not quite as rampant. Of course, the variety of vegetables you will be growing in the fall will be different. While summer is all about plants that bear delicious fruits (think tomatoes, zucchini, eggplant, cucumbers, etc.), fall vegetables shift the focus to leaves, stems, roots, flower buds and pods. Leafy vegetables include lettuce, chard, spinach, collards, kale, cabbage, Brussels sprouts, mustard, endive and chicory. In the lettuce category, you can grow either leaf lettuce or head lettuce and there are enough varieties to keep your gardening endlessly interesting. Until recently a rarely-grown vegetable, healthy kale seems to be enjoying a cult-like following of late, with many recipes available for a variety of dishes, from modernized steamed dishes to kale chips. Leeks could also be put in this category, as the edible part of the plant is actually the bundle of leaf sheaths near the soil surface. Leaf crops like ample water, so be sure to keep the soil evenly moist. A well-known vegetable grown for its stems is celery. Try celery only if you have some experience with gardening. It is slow growing and requires a long, cool growing season of 120-140 days to produce a crop, so be sure your climate can provide for its needs before planting. Another, less well-known stem-type vegetable is kohlrabi; give it a try if you're feeling adventurous! In the root vegetable line-up we have beets, carrots, turnips, rutabagas, parsnips and celery root. With flavors that range from slightly bitter to pleasantly sweet, these vegetables will contribute some interesting additions to your fall and winter menus. Useful in salads, they also provide a hearty addition to soups and stews and many are great roasted. Broccoli and cauliflower are the contenders in the flower bud category. These plants will form heads best when the nighttime temperatures average 45-50 degrees Fahrenheit. With broccoli, once the large main head is harvested, the plant will form side shoots which also can be used. Garden peas, snow peas and sugar snap peas make up the pod section. Garden peas are the traditional pea which must be shelled before eating; snow peas have a translucent, thin pod and are never shelled; sugar snap peas are a cross between garden peas and snow peas, with a thicker edible pod than a snow pea. All varieties are available in climbing and bush varieties. Regular water is the name of the game for peas, with a slight drying-out period between applications. When selecting the area for your garden, choose a spot that will receive at least six hours of sun per day (more is even better). Cultivate the soil (either by hand, if the area is small or with a rototiller for larger plots), mixing in a good amount of organic soil amendment and some pre-planting fertilizer. An efficient way of planting is to plant the vegetables right in the water ditch; this way the water is immediately available to the roots of the plants. Think about starting a garden journal to detail your successes and failures. Keep track of varieties used (save the seed packages or variety labels that came with the plants) and problems encountered. This will help you decide which vegetables to plant in next year's fall garden! Bon appétit! |

|
Popular years ago, indoor plants are making a huge comeback. Their lush, green foliage can truly perk up a dreary interior environment and can be a beautiful addition to any home or office. Not only are they attractive to look at, but indoor plants also convert the carbon oxide that we breathe out into oxygen, thereby refreshing our indoor surroundings. Most indoor plants are hybrids that grow wild somewhere in the world. The key to successfully growing plants indoors is to replicate the environment they naturally grow in. The main factors are location, lighting, water, humidity, and feeding. A few minutes of care each week help your plants flourish, providing years of enjoyment. Bright windowsills are a perfect location for a number of indoor plants to thrive and help chase the winter blues away. (Just make sure to move them in the summer if the area receives direct afternoon sun.) Rotate each container after a few days so that all parts of your plants get an even amount of sunlight. As a rule of thumb, keep the soil moist but not soaking wet. Ensure that the pot has good drainage for excess water. Too much water locked in the pot rots the roots. Most indoor environments are dry and have little humidity. So, use a mister to spray water on the leaves on very dry days. You can also place your pots on containers full of pebbles. Pour water in the container often. This will hydrate your plants from the bottom. Even though indoor plants tend to grow much more slowly than they would outdoors in their natural environments, they still require an infusion of nutrients throughout the year. We recommend using a balanced plant food (use as directed). Indoor plants add color and can dramatically cheer up a home or office, especially during the dog days of winter. We invite you to visit us and pick up a few of these gems today! |

|
At this time of year, when the temperatures are beginning to cool, a the children are gearing up for Halloween and the ubiquitous Jack-o'-Lanterns. |
 |
|
Is it bad to have mushrooms growing in my lawn? Answer: Mushrooms produce tiny spores that are easily blown about in the wind. When these spores reach a favorable place, they germinate and grow. They are very common in areas with decomposing roots or underground stumps from cut down trees, fallen leaves or lawn thatch and other organic matter. Most people want to control lawn mushrooms. Sorry to say, we have yet to find any chemicals that are effective in controlling them. Most mushrooms are harmless to your lawn, even though you might not like the way they look. The best you can do is to remove them with a rake and de-thatch your lawn in the fall. De-thatching removes the fungi's food source. Simply removing the mushrooms may make your lawn look better, but it will not kill the mycellium from which the mushrooms grow. You should be extremely cautious about eating wild mushrooms, because many cause illness and some are deadly. Never eat a mushroom unless you are absolutely sure it is safe. A reference book is not enough--there are poisonous mushrooms that look very similar to non-poisonous ones. If you wish to pick wild mushrooms, please get training first! |

|
The amounts of cheese may look like quite a bit, but you will want every bit of it in this dish! What You'll Need:
Step by Step:
|
 |
Written content © Garden Partners LLC, or respective authors. All Rights Reserved. Privacy Policy. All written content contained in this site is protected by United States copyright law and may not be reproduced, distributed, transmitted, displayed, published, or broadcast without prior written permission of Garden Partners, LLC. You may not alter or remove any trademark, copyright or other notice from copies of the content. |


