|

|
 |
Featured Quote: "A flower is an educated weed." |
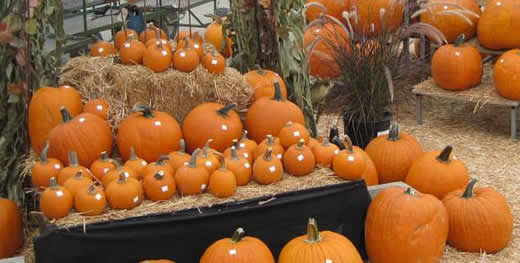
Pumpkins are Here!
|
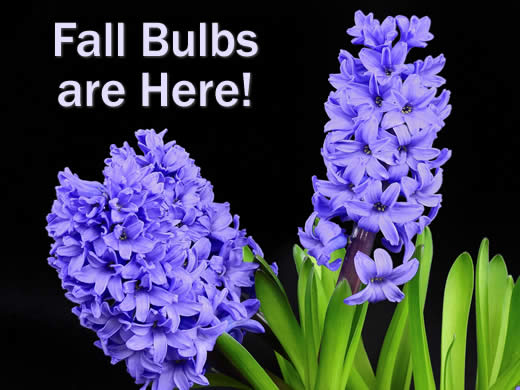
We have tulips, narcissus, hyacinths and bearded iris!
|

|
One of fall's most important and exciting jobs is to start buying and planting spring-flowering bulbs. Bulbs are easy plants to grow. They have a mystique bordering on the miraculous, but growing them here in Southern California is different from growing them in the East or Midwest. Many bulbs need to undergo a cold winter in order to bloom; here in California, we can give them the chill they need by placing these types in the vegetable drawer for a period of about 6-8 weeks prior to planting. These bulbs should generally not be left in the ground when the foliage has died down after they bloom. They should be lifted and stored in a cool, well-aired area (keeping them in a brown paper bag is a good idea), then re-refrigerated once again 6-8 weeks prior to planting the following spring. There are several types of bulbs that can be naturalized (left in the ground) and will bloom reliably each spring without any winter chill at all. Many of these are drought resistant, and are unbelievably easy to grow. BUY BULBS NOW TO PLANT LATER Bulb season is short and garden centers generally order a finite amount of stock, so begin purchasing spring-flowering bulbs as soon as possible. They soon get picked over and sometimes get put back in the wrong bins. Do your research on the more exotic bulbs; some are not suited to our temperate climate. Choose the largest and fattest bulbs (because they produce the biggest blooms) and make sure the bulb is firm and not spongy. Make sure you label each bag with the type of bulb, its color and its recommended planting depth and spacing. Bulbs to naturalize Among the best bulbs to naturalize in California are daffodils (Narcissus), Dutch iris, grape hyacinth (Muscari), Freesia, Sparaxis, Ixia, Watsonia, Lycoris and Crocosmia. Included in the Narcissus family are the popular paperwhites; they will be the first to bloom in this group and are prized for their heady fragrance. Dutch iris and Freesia make wonderful cut flowers. Daffodils can also be used for bouquets, but if you plan to use them in a mixed arrangement with other flowers, their stems must be seared with an open flame after cutting - the sap in the plant will cause the other flowers to wilt quickly. If you have a gopher problem however, daffodils are a great choice; because they are poisonous, gophers will not eat them (unlike tulips, which they love). When planting these types of bulbs, it is best not to be too precise in their placement - this will give a much more natural, much less contrived look to the planting area. A good method for placement is to take a handful of bulbs and gently toss them - where they land is where they will be planted. Eventually (usually in about 3-4 years), the bulbs will become overcrowded and their blooms will decline. When this happens, it is time to divide the clump and replant the bulbs; you will probably have quite a few to share with family and friends! Bulbs that require pre-chilling and lifting Tulips, hyacinths and crocus all require much more winter chill than we receive in California. For this reason, they must be chilled in the vegetable drawer in the refrigerator before planting, as noted above. What will happen if you skip this step? If they bloom at all, the flowers will be borne on very short stems - not a big deal in the case of crocus, but not very attractive when it comes to a tulip. After the foliage has all turned brown (never cut off green foliage on a bulb - it is through the foliage that it gets the necessary nutrients to bloom the following year), the bulbs must then be dug up and stored as detailed above. While they may sprout and bloom the following year if left in the ground, they will not be as vigorous or as floriferous and eventually they will decline completely. They also may rot due to overwatering during their dormant state, when they have no means to use water; this is a particular problem in beds with other plants that must be watered over the summer. Bulbs that can be planted without pre-chilling, but won't naturalize well Ranunculus and anemones do not need pre-chilling, but it is best if they are lifted (after the foliage has withered and died), stored in a well-aired place and replanted each spring. Like tulips, hyacinths and crocus, they tend to decline each year when left in the ground. They should not be eliminated from the bulb garden because of this, though. They put on such a beautiful display that, even if you treated them as an annual, it would be worth it. Both ranunculus and anemones make great cut flowers. Buy early, wait a bit to plant Even though it will be tempting to plant your little beauties as soon as you return from the garden center, we strongly advise you wait a little longer before planting them. They will perform much better if you plant them in mid- to late October, when the daytime temperatures have cooled down and the nights are crisp and fresh. For the time being, keep them in brown paper bags in the garage; you can congratulate yourself on the fact that you "beat the crowd" to the garden center and were able to select all the colors and types you really wanted! |

|
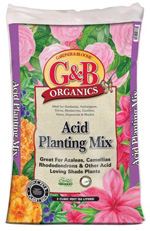
Many enthusiastically consider the camellia "Queen of the Garden," especially while roses are quietly resting. Ok, so our roses in the west don't begin to rest until we forcefully, but of course sadly, decide that we must cut them back in January. Luckily for us, beginning in September and continuing into the Spring, the camellia brings elegant floral form and color into our gardens. They are wonderful in the garden as a standard and single focal point, en masse, or as a container plant. This shrub has beautifully rich, dark green shiny foliage and when pruned properly, gorgeous plant form, thereby contributing to the beauty of a garden year round. Other positive attributes include the fact that camellias are relatively pest- and disease-free. What more could you ask for? The two major groups of camellias are Camellia japonica and Camellia sasanqua. Camellia japonicas bloom January through May. They have larger, glossy green leaves and flowers that are not fragrant. These camellias are evergreen and prefer to be planted in dappled shade and even deep shade. Camellia sasanquas bloom from September through December. They have smaller leaves and depending on the variety, will grow in full sun or deep shade. They are wonderful as a specimen plant, unclipped. There are many bloom types to consider when choosing your camellia: anemone, rose, single, formal double, peony, and many more. Both the C. japonica and C. sasanqua have many varieties to choose from. When making your selection, consider not only bloom form and color but also bloom time. You can have your camellias blooming from September into May with a wise and thought out selection. Bloom form is important to most of us. If you live by the coast, talk with your nursery expert to be sure that a more complex form with a higher petal count will open fully in spite of the morning and afternoon damp fog. Don't despair, there are varieties equally beautiful but with a simpler form. There are so many attributes to each flower type that you just have to see them to appreciate them fully. Plant your new camellia using to give this wonderful plant the best start in your garden. Take care to plant the root ball slightly higher than the soil line, not lower. Once your camellias are loaded with buds, do not feed them. Have you ever fertilized your heavily laden-with-flower-buds camellia shrub, thinking of course that you are helping the buds to burst into fabulous color, only to be horrified when they all fell off? The camellia does not want fertilizer once the buds are set. Don't worry, the plant will reward you fully without any additional food. Once the bloom time is complete in the spring, you'll want to use an excellent all-around fertilizer, to give a healthy boost and reward your plants for their colorful winter flower "show." |

|
Many home gardeners lament the coming of cooler weather since it usually spells the beginning of the end of the outdoor growing season. But it doesn't have to be that way. Many herbs can be grown indoors quite successfully in the cooler months and then be transplanted into the garden the following spring. If you've got herbs already growing in containers outside, you can also simply bring them indoors as the weather cools down. There's something about the taste of fresh, home-grown herbs in cooking that is hard to beat. The flavors are so much more flavorful and aromatic than using something dry out of a shaker bottle. With the right location and care, many herbs can be fooled into thinking that summer is still here. If you're a little nervous or skeptical about growing herbs indoors, use some tried and tested varieties such as chives, coriander, dill, mint, oregano, rosemary, parsley, and thyme. Most of these can be started by seed, while mint and rosemary can be started by seed or cutting. Most herbs are sun lovers and will require a southern facing window that gets at least six hours of sunlight per day. For less sunny locations, mint, parsley and rosemary will get by with less sunlight. You might also consider hanging a grow light 6-9 inches above your plants to provide light on cloudy days. Make sure to also rotate your containers at least once per week in order to help your plants grow evenly. Start your plants in seed trays and then transplant them to window boxes or larger containers once the plants become rooted. Use a good quality potting soil and make sure the containers you use have drainage holes. If you use water trays under your pots, make sure that you check them after watering and drain any standing water in them. The herbs mentioned above will do fine provided temperatures are maintained between 55 and 70 degrees. Feed with a water soluble plant food every 2-4 weeks just as you would any other indoor plant, and don't water until the soil surface becomes dry. The use of a small fan will also help herbs survive the stuffy air conditions that can occur indoors in winter. Plant pests are usually less prevalent during the winter months. Nevertheless, visually check your plants at least once per week, and treat your plants with an insecticidal soap before pests actually become a problem. So don't let the winter doldrums get you down. Spice up your life and your winter meals with the addition of fresh, homegrown indoor herbs! |

|
Have a bumper crop of pumpkins? Once you've made your quota of pumpkin pies and carved all your jack-o-lanterns, continue to make use of those colorful gourds to decorate your house, deck and patio for fall. Pumpkin Cachepot: Create a festive container for fall-blooming plants such as chrysanthemums or ornamental kale and cabbage, following these simple steps:
Now--what to do with those seeds? Make some delicious and Sugar and Spice Pumpkin Seeds for healthy snacking or as a great salad topping: Ingredients:
Preheat oven to 300 degrees. Rinse seeds, removing as much of the pulp as possible; don't worry about leaving a small amount of pulp (it is impossible to remove it all). Pat the seeds dry, then toss them with the butter, sugar and spices. Spread the seeds in a shallow baking sheet (spray sheet with a light coating of cooking spray to prevent sticking). Bake for 45-60 minutes, turning occasionally, until lightly browned and crunchy. This recipe may be doubled or tripled, depending on the number of seeds you have. |

|
 |
|
What's the difference between a daffodil and a narcissus? Answer: There is no difference. The two words are synonyms. Narcissus is the botanical name for daffodils, just as ilex is for hollies. Daffodil is the common name for all members of the genus Narcissus, and its use is recommended by the American Daffodil Society at all times other than in scientific writing. In some parts of the country, any yellow daffodil is called a jonquil, usually incorrectly. As a rule, but not always, jonquil species and hybrids are characterized by several yellow flowers, strong scent, and rounded foliage. But who really cares? They are all lovely flowers--and we say, "Call them whatever makes you happy!" |

Step by Step:
Yield: 8 servings Nutritional Analysis: One serving (3/4 cup) equals 149 calories, 4 g fat (1 g saturated fat), 0 cholesterol, 164 mg sodium, 28 g carbohydrate, 3 g fiber, 2 g protein. Diabetic Exchanges: 1-1/2 starch, 1/2 fat. |
 |
Written content © Garden Partners LLC, or respective authors. All Rights Reserved. Privacy Policy. All written content contained in this site is protected by United States copyright law and may not be reproduced, distributed, transmitted, displayed, published, or broadcast without prior written permission of Garden Partners, LLC. You may not alter or remove any trademark, copyright or other notice from copies of the content. |


