|

|
 |
Featured Quote: "Gardening gives one back a sense of proportion about everything--except itself." |
 |
We will notify you in Mid-December to February when your order arrives. |
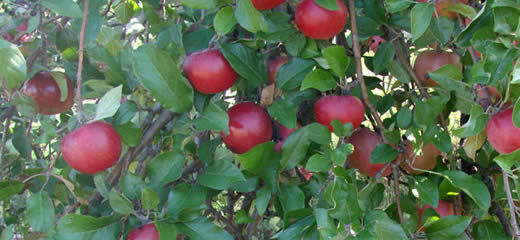
The H&H Nursery pre order fruit tree program is available now. Offer ends November 4, 2016.
Click link to see the selection of deciduous fruit trees that are available on this program.
Click to download 2017 Pre-Order Fruit Tree Form |

|
All the crazy weather we have had this summer across the country serves as a great reminder to make sure to address any slope erosion problems before they arise. And fall is a great time of year to plant shrubs and ground covers that can help to prevent a hillside from slipping away. Consider that the upcoming cool months provide a time when plant roots grow fast and the need for water is less apparent for new plantings. You and your newly planted stock now have an advantage over the hot summer sun or cold winter nights. To see if you have a potential hillside erosion problem, be alert for these tell-tale signs:
A number of excellent plant and groundcover choices not only thrive with the good drainage conditions of most hillsides but will also go a long way in providing protection from heavy rains. The key is to plant a mixture of plant types and sizes. You want to have layers of vegetation for rainfall to hit, so it will be diffused before it reaches the ground. Generally the larger the plant grows, the deeper its roots, so don't neglect the larger, slower-growing plants. |
 |
|
One of the great things about the fall season is that it presents the opportunity to enjoy the vivid color of chrysanthemums, helping gardeners to achieve four-season interest in their gardens. Chrysanthemum flowers are also a favorite of florists for arrangements, due to the longevity of their blooms. Chrysanthemums were cultivated in China as a flowering herb as far back as the 15th century BC. The flower was introduced into Japan in the 8th century AD, and the Emperor adopted the flower as his official seal. Today there is still a "Festival of Happiness" in Japan celebrating the flower. Mums were brought to Europe in the 17th century and the rest of the world has enjoyed them ever since. Modern chrysanthemums are much more showy than their wild relatives. The flowers occur in many flower forms, and can be daisy-like, decorative, pompons or buttons. Chrysanthemums come in a wide variety of colors, including white, off-white, yellow, gold, bronze, red, burgundy, pink, lavender and purple. Chrysanthemum plants can grow to be 2-3 feet high, depending on the cultivar and growing conditions. There are "hardy mums" and "florist mums." Hardy mums put out stolons. Florist mums put out few or no stolons, which makes them less likely to over-winter in cold regions. Mums look best planted in a mass--but for good health don't overcrowd them, since good air circulation reduces the chance of disease. Plant chrysanthemum flowers in full sun and well-drained soil, enriched with a soil conditioner. Chrysanthemums are "photoperiodic," meaning they bloom in response to the shorter days and longer nights experienced in fall. Therefore, do not plant chrysanthemum flowers near street lights or night lights: the artificial lighting may wreak havoc with the chrysanthemums' cycle. We invite you to visit us and take some hardy mums home for your garden to brighten up your autumn garden. Chrysanthemums also make great housewarming gifts--and your friends will thank you for thinking about them. So remember, mum's the word! |

|
Summer vegetable gardening enthusiasts seem to out-number those that grow vegetables in the fall by quite a bit. We're not really sure why. Fall vegetable gardening has a lot of things going for it. The temperatures are not as hot, so the garden does not require as much water as it did in the summer; it's also much more pleasant to garden in the cooler weather. There are not as many pests and generally the weed growth is not quite as rampant. Of course, the variety of vegetables you will be growing in the fall will be different. While summer is all about plants that bear delicious fruits (think tomatoes, zucchini, eggplant, cucumbers, etc.), fall vegetables shift the focus to leaves, stems, roots, flower buds and pods. Leafy vegetables include lettuce, chard, spinach, collards, kale, cabbage, Brussels sprouts, mustard, endive and chicory. In the lettuce category, you can grow either leaf lettuce or head lettuce and there are enough varieties to keep your gardening endlessly interesting. Until recently a rarely-grown vegetable, healthy kale seems to be enjoying a cult-like following of late, with many recipes available for a variety of dishes, from modernized steamed dishes to kale chips. Leeks could also be put in this category, as the edible part of the plant is actually the bundle of leaf sheaths near the soil surface. Leaf crops like ample water, so be sure to keep the soil evenly moist. A well-known vegetable grown for its stems is celery. Try celery only if you have some experience with gardening. It is slow growing and requires a long, cool growing season of 120-140 days to produce a crop, so be sure your climate can provide for its needs before planting. Another, less well-known stem-type vegetable is kohlrabi; give it a try if you're feeling adventurous! In the root vegetable line-up we have beets, carrots, turnips, rutabagas, parsnips and celery root. With flavors that range from slightly bitter to pleasantly sweet, these vegetables will contribute some interesting additions to your fall and winter menus. Useful in salads, they also provide a hearty addition to soups and stews and many are great roasted. Broccoli and cauliflower are the contenders in the flower bud category. These plants will form heads best when the nighttime temperatures average 45-50 degrees Fahrenheit. With broccoli, once the large main head is harvested, the plant will form side shoots which also can be used. Garden peas, snow peas and sugar snap peas make up the pod section. Garden peas are the traditional pea which must be shelled before eating; snow peas have a translucent, thin pod and are never shelled; sugar snap peas are a cross between garden peas and snow peas, with a thicker edible pod than a snow pea. All varieties are available in climbing and bush varieties. Regular water is the name of the game for peas, with a slight drying-out period between applications. When selecting the area for your garden, choose a spot that will receive at least six hours of sun per day (more is even better). Cultivate the soil (either by hand, if the area is small or with a rototiller for larger plots), mixing in a good amount of organic soil amendment and some pre-planting fertilizer. An efficient way of planting is to plant the vegetables right in the water ditch; this way the water is immediately available to the roots of the plants. Think about starting a garden journal to detail your successes and failures. Keep track of varieties used (save the seed packages or variety labels that came with the plants) and problems encountered. This will help you decide which vegetables to plant in next year's fall garden! Bon appetit! |

|
If you have an herb garden you know what a great pleasure it is to have access to your own home-grown herbs--ones that are exactly to your taste, rather than a generic supermarket blend. Drying or freezing some of your herbs can give you that pleasure year-round. Along with the taste advantage, your own herbs are much, much cheaper. The method of preparing herbs for storage that gives you the best flavor and fragrance is air-drying. But if you don't have a warm, dry area that is suitable, or you have herbs that aren't suited for air-drying, don't despair! There are other methods that work almost as well. Natural Air-drying: Air-Dry Method 1:
Air-Dry Method 2:
Drying in an Oven: For oven-drying, heat the oven to a low heat (150-200F), place the herbs on a baking sheet in the oven, keep the oven door open and bake the herbs until they are dry. This will take several hours, maybe longer if you are drying high-moisture herbs. Keep an eye on them--you want them dried, not burned! Some people dry herbs in the microwave--we don't advise that, as it takes out a lot of the flavor and fragrance. If you must dry this way, put about 4 branches in the oven between paper towels. Heat for a minute or two on high. If the herbs are not brittle and dry when removed from the oven, repeat for 30 seconds more each time until dry. Freezing Herbs: If they are to be used in soups or stews, you can do a quick and handy freeze in an ice cube tray. Chop up the leaves and put a teaspoon of the herb in each section. Fill with water and put the tray in the freezer. To use, simply remove the pre-measured herb in the ice cube, and drop as many as you need in your soup or stew. You can also simply put a few bunches in a freezer bag or other container and put them in the freezer. With summer still here, garden herbs are in high gear, producing lots of pleasing, aromatic foliage that is great for cooking and potpourris. Freshly harvested leaves are wonderful for cooking, but you might want to preserve some to use later in the year or to create sachets that will fill your home with wonderful scents. |
 |
|
My orchid's roots are bulging out of the holes in my container. Do I need to re-pot it? Answer: Ideally, orchids should be repotted immediately after flowering. For best results, orchids should be grown either in sphagnum moss or a fine-medium orchid bark mix. You can also combine the two. Orchids do not grow well in soil, because that is not how they grow normally. Most are found in the tree canopy high above the jungle floor. Make sure your new orchid pots have good drainage. |

 click here for a printer friendly version of this page
 |
Written content © Garden Partners LLC, or respective authors. All Rights Reserved. Privacy Policy. All written content contained in this site is protected by United States copyright law and may not be reproduced, distributed, transmitted, displayed, published, or broadcast without prior written permission of Garden Partners, LLC. You may not alter or remove any trademark, copyright or other notice from copies of the content. |


