|

|
 |
Featured Quote: "Though I do not believe that a plant will spring up where no seed has been, I have great faith in a seed. Convince me that you have a seed there, and I am prepared to expect wonders." |
 |
| We will be closed on Monday in honor of Labor Day. We will resume our normal operating hours on Tuesday, 9/6. |
 |
|
When I was a kid, the arrival of Indian summer was the last summer hurrah! It was still light enough to play outside after dinner, and warm enough to wear shorts. Even though school had begun, you still had a couple of weeks of warm summertime fun. Well, now I realize that it was also a couple more weeks of summertime flower color for my parents to enjoy in their gardens! Somehow, I think they must have planned ahead to ensure that the gardens were beautiful. That's right. Now is the time to tuck into your garden beds and patio paradise containers some of your favorite late summer and fall blooming perennials and shrubs. You may be the type of gardener who has a complete plan of colors, sizes and shapes in mind. Or you might be a gardener that loves just to collect plants of all colors, sizes and forms. You know who you are and what your style is. There are plenty of late summer and autumn bloomers to choose from. Our plant selection is a veritable treasure chest of Indian Summer colors. Come into the garden center and begin choosing today. Don't forget to pick up a good soil amendment. Oh yes, and to promote those non-stop blooms, feed them regularly. Then sit back on a lounge chair or hammock--and enjoy your Indian summer garden in full bloom! |
 |
|
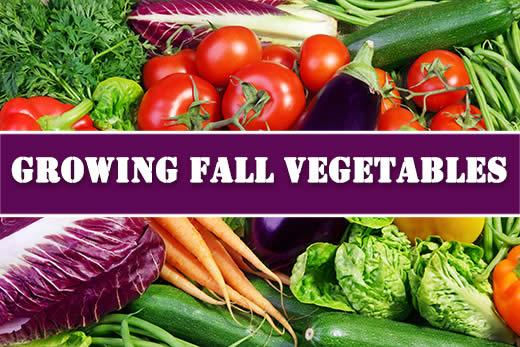
Summer vegetable gardening enthusiasts seem to out-number those that grow vegetables in the fall by quite a bit. We're not really sure why. Fall vegetable gardening has a lot of things going for it. The temperatures are not as hot, so the garden does not require as much water as it did in the summer; it's also much more pleasant to garden in the cooler weather. There are not as many pests and generally the weed growth is not quite as rampant. Of course, the variety of vegetables you will be growing in the fall will be different. While summer is all about plants that bear delicious fruits (think tomatoes, zucchini, eggplant, cucumbers, etc.), fall vegetables shift the focus to leaves, stems, roots, flower buds and pods. Leafy vegetables include lettuce, chard, spinach, collards, kale, cabbage, Brussels sprouts, mustard, endive and chicory. In the lettuce category, you can grow either leaf lettuce or head lettuce and there are enough varieties to keep your gardening endlessly interesting. Until recently a rarely-grown vegetable, healthy kale seems to be enjoying a cult-like following of late, with many recipes available for a variety of dishes, from modernized steamed dishes to kale chips. Leeks could also be put in this category, as the edible part of the plant is actually the bundle of leaf sheaths near the soil surface. Leaf crops like ample water, so be sure to keep the soil evenly moist. A well-known vegetable grown for its stems is celery. Try celery only if you have some experience with gardening. It is slow growing and requires a long, cool growing season of 120-140 days to produce a crop, so be sure your climate can provide for its needs before planting. Another, less well-known stem-type vegetable is kohlrabi; give it a try if you're feeling adventurous! In the root vegetable line-up we have beets, carrots, turnips, rutabagas, parsnips and celery root. With flavors that range from slightly bitter to pleasantly sweet, these vegetables will contribute some interesting additions to your fall and winter menus. Useful in salads, they also provide a hearty addition to soups and stews and many are great roasted. Broccoli and cauliflower are the contenders in the flower bud category. These plants will form heads best when the nighttime temperatures average 45-50 degrees Fahrenheit. With broccoli, once the large main head is harvested, the plant will form side shoots which also can be used. Garden peas, snow peas and sugar snap peas make up the pod section. Garden peas are the traditional pea which must be shelled before eating; snow peas have a translucent, thin pod and are never shelled; sugar snap peas are a cross between garden peas and snow peas, with a thicker edible pod than a snow pea. All varieties are available in climbing and bush varieties. Regular water is the name of the game for peas, with a slight drying-out period between applications. When selecting the area for your garden, choose a spot that will receive at least six hours of sun per day (more is even better). Cultivate the soil (either by hand, if the area is small or with a rototiller for larger plots), mixing in a good amount of organic soil amendment and some pre-planting fertilizer. An efficient way of planting is to plant the vegetables right in the water ditch; this way the water is immediately available to the roots of the plants. Think about starting a garden journal to detail your successes and failures. Keep track of varieties used (save the seed packages or variety labels that came with the plants) and problems encountered. This will help you decide which vegetables to plant in next year's fall garden! Bon appétit! |
 |
|
In the Kitchen Garden:
The Flower Garden:
The Greenhouse and Conservatory:
|

|
By Tamara Galbraith Here's a basic primer on how to divide some of your perennials. Don't neglect this fall duty; it's nature's way of giving you free plants! Just like pruning, dividing should be done in the season opposite of planting, i.e., spring flowering = fall dividing and vice versa. Try to plan your dividing project for a cloudy, slightly cooler day with a good chance of rain thereafter. Most perennials should be divided every three to five years. However, some, like columbines, poppies and euphorbias shouldn't ever be divided, even if they start to clump. Don't divide woody plants like lavender, rosemary or the bigger artemesias either. Before starting your division project, thoroughly water all plants to be divided a day or two before you dig in. Likewise, prepare planting holes for the new divisions so they aren't languishing (and drying out) above ground for too long. You can also pot up divisions to build up size, overwintering pots in a protected environment. Make sure your tools are clean and, more importantly, very sharp. Use a sharp pointed shovel or spading fork to dig down deep on all four sides of the plant, about 4 to 6 inches away from the plant. Pry underneath and lift the whole clump to be divided. If the plant is very large and heavy, you may need to divide it right in the ground with a sharp shovel before lifting the new sections out. Shake or hose off loose soil and remove dead leaves and stems. This will help loosen tangled root balls and make it easier to see what you are doing. Depending on the root system, divide your plants as follows: • Spreading root systems that have just a mess of disorganized roots include such plants as asters, bee balm, lamb’s ear, purple cornflowers and many other common perennials. Some can get out of control unless you divide them frequently. Luckily, they can usually can be pulled apart by hand, or cut apart with shears or knife. Divide the plants into clumps of three to five vigorous shoots each. Toss the center of the clump into the compost pile if it looks like it's run its course and is weaker than the outside edges. • As the name suggests, clumping root systems originate from a central clump with multiple growing points and usually have thick fleshy roots. This group includes astilbes, hostas, daylilies and many ornamental grasses. A sharp knife is handy with these guys, as it is often necessary to cut through the thick crowns to separate the divisions. You can also pry apart these roots with two digging forks held back to back. Make sure at least one developing eye or bud exists on each division. • Rhizomes are stems that grow horizontally at or above the soil level. Irises are the most common perennial with this type of root system. Divide irises any time between a month after flowering until early fall. Cut and discard rhizome sections that are one year or older and/or showing signs of disease and insect damage. Iris divisions should retain a few inches of rhizome and one fan of leaves, trimmed back halfway. Replant with the "shoulders" of the rhizome showing above soil level. • Tuberous roots, like dahlias, should be cut apart with a sharp knife. Every division must have a piece of the original stem and a growth bud attached. After division they can either be replanted or stored for spring planting. Silly as it sounds, dividing is probably my favorite fall gardening chore. When you dig up one daylily and all of a sudden it becomes four...well, for an avid gardener, that's like a magic show and a birthday gift all rolled into one! |
 |
|
How often should I add mulch to my garden and how much should I use? Answer:
|

Step by Step:
Yield: 12 servings |
 click here for a printer friendly version of this page
 |
Written content © Garden Partners LLC, or respective authors. All Rights Reserved. Privacy Policy. All written content contained in this site is protected by United States copyright law and may not be reproduced, distributed, transmitted, displayed, published, or broadcast without prior written permission of Garden Partners, LLC. You may not alter or remove any trademark, copyright or other notice from copies of the content. |


