|

|
 |
"How cunningly nature hides every wrinkle of her inconceivable antiquity under roses and violets and morning dew!" |

|
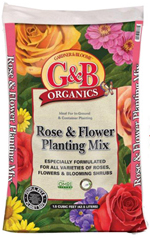
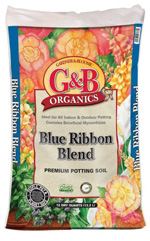
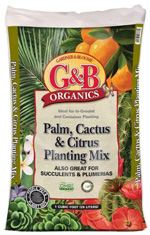
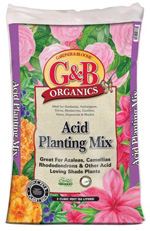
Some gardeners shy away from growing plants in containers because of endless "failure" stories buzzing in their heads. Container plantings are not difficult, but you do need to keep a few things in mind--including selection of container, type of planting mix, feeding and watering needs. These are the variables differentiating growing plants in the ground from growing them in containers. First of all, different types of containers will lead to different types of watering needs. For example, terracotta pots are probably the most porous of the clay pots. This porosity allows the soil to dry out more quickly. Glazed pots are next in line. The glaze on the outside of the pot actually helps to keep moisture in more than a non-glazed clay pot would. Thick cement containers probably fall in line together with the glazed pots. Finally, there are plastic and some of the new composite material containers. These containers will hold the moisture far longer than the other pots. The soil mix itself should breathe and should be light and airy. We recommend using an all organic potting soil for most plants. But be sure to use the right type of potting soil for your plant. Most plants do fine in normal potting soil, but the reason you'll see things like "cactus mix" on the shelves is that some plants have special needs. Because plants in containers have a limited amount of soil area, they will need to be fed more often than plants in the ground. We recommend feeding most plants every two weeks with a liquid or water-soluble plant food or every two months with a dry fertilizer. Again, some plants have different needs, so adjust as necessary for your own container garden. Plants in containers can often suffer from dehydration, especially in the summer months of the year. Water those that need moist soil frequently, especially if your container is made of a more porous material. Drought-tolerant plants will like a pot that dries out quickly, but a water-needy plant will want to have consistently moist (but not wet) conditions. If you let your potting soil dry out too much, the root ball will shrink and the water will run straight down the sides and out of the bottom of your container. If this happens, you will need to leave the water dripping into your container for a long enough time to rehydrate the potting soil. If the container is small enough, dunk it into a big bucket of water and let it sit there for a few minutes until the root ball expands again and properly fills the pot. Container gardening is a wonderful way to add splashes of plants and color in all areas of your outdoor rooms, and for those with only small patios, container gardening is the only way to go. Just remember not to treat container plants exactly like in-ground plantings, and you'll be fine. |
 |
|
When the weather is hot and dry and there is no measurable rain, even rookie gardeners are aware that most plants will not survive without regular watering. Unfortunately, just giving them a squirt with the water hose isn't going to do much to relieve their stress. Wise gardeners give their plants the amount of water each one needs in ways that save time, effort and water. It is important to use the right equipment. Much water can be saved in the summer by watering each part of the garden by a method appropriately suited for it. Briefly, hand sprinkling is fine for sprouting seeds, but all other watering should be done with conventional irrigation systems or drip systems. Reserve watering by hose for filling furrows and basins around trees and bushes, when these are not equipped with bubblers. (When you water this way, put the hose right down on the ground, and let the water sink in slowly.) In summer (or anytime for that matter), it is best to irrigate deeply but less frequently to encourage plants to send down deeper roots that are protected from the summer heat. Vegetables and annual flowers, though, will have to be watered more frequently since they don't produce deep root systems. For most grass lawns, watering to the point of runoff every 2-3 days is sufficient. Always water your garden in the early morning hours between 4:00 AM and 8:00 AM to reduce water evaporation. Be sure to give special care to plants in containers. Plants in containers often suffer at this time of the year. Water them frequently, especially plants in terra cotta pots. These porous containers "breathe," allowing water to evaporate faster than plastic or glazed ceramic pots. If you take good care of your plants in summer, you will be rewarded throughout the rest of the year. |

|
If you have an herb garden you know what a great pleasure it is to have access to your own home-grown herbs--ones that are exactly to your taste, rather than a generic supermarket blend. Drying or freezing some of your herbs can give you that pleasure year-round. Along with the taste advantage, your own herbs are much, much cheaper. The method of preparing herbs for storage that gives you the best flavor and fragrance is air-drying. But if you don't have a warm, dry area that is suitable, or you have herbs that aren't suited for air-drying, don't despair! There are other methods that work almost as well. Natural Air-drying: Air-Dry Method 1:
Air-Dry Method 2:
Drying in an Oven: For oven-drying, heat the oven to a low heat (150-200F), place the herbs on a baking sheet in the oven, keep the oven door open and bake the herbs until they are dry. This will take several hours, maybe longer if you are drying high-moisture herbs. Keep an eye on them--you want them dried, not burned! Some people dry herbs in the microwave--we don't advise that, as it takes out a lot of the flavor and fragrance. If you must dry this way, put about 4 branches in the oven between paper towels. Heat for a minute or two on high. If the herbs are not brittle and dry when removed from the oven, repeat for 30 seconds more each time until dry. Freezing Herbs: If they are to be used in soups or stews, you can do a quick and handy freeze in an ice cube tray. Chop up the leaves and put a teaspoon of the herb in each section. Fill with water and put the tray in the freezer. To use, simply remove the pre-measured herb in the ice cube, and drop as many as you need in your soup or stew. You can also simply put a few bunches in a freezer bag or other container and put them in the freezer. With summer here, garden herbs are in high gear, producing lots of pleasing, aromatic foliage that is great for cooking and potpourris. Freshly harvested leaves are wonderful for cooking, but you might want to preserve some to use later in the year or to create sachets that will fill your home with wonderful scents. |
 |
|
Who's your bud? Not the budworm. When the weather warms up, you can bet this pest is on its way. The budworm (a type of caterpillar/moth) is gunning for your geraniums, petunias, snapdragons, and other flowering plants. Knowing the budworm's diet, habits, and the effective control methods, you will be armed and ready for combat. It can be hard to spot budworms. They are very small and they tend to take on the color of the bloom or foliage they are infesting, further enhancing their camouflage. You will see irregular chewing on the blossoms and round holes through flower buds and leaves. The numerous black droppings they leave behind are one of the telltale signs. Many gardeners may not know they have a problem until the damage becomes severe. Controlling this pest depends on the amount of planting. With a small patio of plants, physically removing and killing them should be effective. A larger yard would require spraying. Insecticides that contain Bt (Bacillus thuringiensis) offer reasonably effective biological control. Because the Bt must be ingested by the insect to be effective, it may take a few days before you no longer see any signs of budworms. Plant sprays containing Sevin are also effective in controlling budworms. Now that you know what to look for, and what to spray, you'll be armed and ready at the first sign of attack. |
 |
|
What does the term "systemic" mean on a chemical label? Answer:
Most systemic products should not be used on any edible plants or crops. |

|
What You Need:
|
|
Step by Step:
|
 click here for a printer friendly version of this page
 |
Written content © Garden Partners LLC, or respective authors. All Rights Reserved. Privacy Policy. All written content contained in this site is protected by United States copyright law and may not be reproduced, distributed, transmitted, displayed, published, or broadcast without prior written permission of Garden Partners, LLC. You may not alter or remove any trademark, copyright or other notice from copies of the content. |


