|

|
 |
FEATURED QUOTE : "Every spring is the only spring--a perpetual astonishment. " |
|
NEW ARRIVALS
|
 |
Hours for Easter Weekend: Friday 4/3/15: 7:30 AM to 5:30 PM Saturday 4/4/15: 8:00 AM to 5:30 PM Sunday 4/5/15: 9:00 AM to 1:00 PM |
 |
 |
|
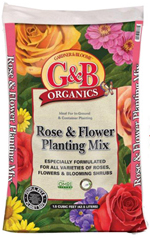
Planting There's still time to plant roses. They are full of buds and blooms right now--and they are simply gorgeous. If you are a beneficial insect lover, flat-topped flowers like Shasta daisies, scabiosa, strawflowers, and yarrow are perfect additions to your garden for feeding them. Beneficial insects such as the almost microscopic parasitic wasps, ladybugs, etc. keep other insect pests away from your vegetable gardens by eating aphids, scale, and other annoying intruders. You can use beautiful flowers to tempt these garden friends into your garden. Try putting some of these flowers near to your rose garden for aphid control! Time to plant dahlias, begonias--and get in the gladiolus bulbs. Add some bone meal to the planting hole. The narcissus and daffodils are blooming, as well as other spring blooming bulbs. As soon as the blooms are spent, you can deadhead--but don't remove the foliage! The bulb needs that green foliage to add nutrients back to the bulb for next year's flowers. Hide the clippers for a little while longer. Try an old-fashioned technique of braiding the leaves. If you must cut, leave at least half of the leaf length for the bulb. It will thank you with next year's bloom! It's time to start warm season crops. Coastal areas can continue planting cool season crops like the leaf lettuces, radishes, and spinach for a while. Inland zones (not the high desert, though) can start the warm season vegetables such as beans, corn, squashes, cucumber, eggplant, tomatoes and peppers. We have them all and more. Maintenance You may see some chlorosis on your acid-loving plants like the azalea or camellia, and possibly on your citrus. This yellowing of the leaves between the veins is a sign of iron deficiency for the plant. Feed with a good iron supplement. Especially near the coast, this is the time we begin to see powdery mildew on our rose foliage (and other plants too). There are several different foliar fungicidal sprays to that can help. Aphids will be back. Remember that you can first wash them off with water. Really, it does help. For more severe infestations, ask us to recommend something suitable for your particular plants. Continue to replenish your mulch and maintain a 2-4" blanket over your soil. |


If you are lucky enough to have a potted Easter lily, you may wish to extend your enjoyment of its lovely blooms. As the flowers mature, remove the yellow anthers before the pollen starts to shed. This gives longer flower life and prevents the pollen from staining the white flowers. When a mature flower starts to wither after its prime, cut it off to make the plant more attractive while you still enjoy the fresher, newly-opened blooms. The lily will thrive near a window in bright, indirect natural daylight, but avoid glaring, direct sunlight. Easter lilies prefer moderately moist, well-drained soil. Water the plant thoroughly when the soil surface feels dry to a light touch, but avoid over-watering. If the pot is wrapped in decorative foil, be careful not to let the plant sit in trapped, standing water. For best results, remove the plant from decorative pots or covers, take it over the sink and water thoroughly until water seeps out of the pot's drain holes to completely saturate the soil. Allow the plant to air for a few minutes and discard the excess water before replacing it in its decorative pot cover. If you'd like to plant your Easter lilies outside, prepare a well-drained garden bed in a sunny location with rich, organic matter. Plant Easter lily bulbs 3 inches below ground level, and mound up an additional 3 inches of topsoil over the bulb. This creates a slightly raised bed (with soil a few inches higher than the level around it) that will help with drainage and soil aeration. Plant at least 12 to 18 inches apart in a hole sufficiently wide so that the bulbs can be placed in it with the roots spread out and down, as they naturally grow. Spread the roots and work the prepared soil in around the bulbs and the roots, leaving no air pockets. Water in immediately and thoroughly after planting. Try not to allow the soil to heave or shift after planting. As the original plants begin to die back, cut the stems back to the soil surface. New growth will soon emerge. Easter lilies, forced to bloom under controlled greenhouse conditions in March, bloom naturally in the summer. You may be rewarded with a second bloom later this summer, but most likely you will have to wait until next June or July to see them bloom again. Another planting tip to consider is that lilies like their roots in shade and their heads in the sun. Mulching helps conserve moisture in between waterings, keeps the soil cool and loose, and provides a fluffy, nutritious medium for the stem roots. For a more attractive alternative, plant a "living mulch," or a low ground cover of shallow-rooted, complementary annuals or perennials. The stately Easter lilies rising above lacy violas or primulas are not only aesthetically pleasing, but also sound gardening. Easter lily bulbs are surprisingly hardy even in cold climates. Just be sure to provide winter protection by mulching the ground with a thick, generous layer of straw, pine needles, leaves, ground corncob, pieces of boxes or bags. Carefully remove the mulch in the spring to allow new shoots to come up, and your Easter lilies will keep on providing you beauty, grace, and fragrance in years to come. |

|
We love impatiens as much as the next person, but the recent proliferation of downy mildew has taken much of the joy out of growing them. Signs that your plants are suffering from an infestation of downy mildew are: Because of this ongoing problem, many growers are decreasing their production of Impatiens walleriana, some as much as 60%. For this reason, finding this type of impatiens at all might be difficult. If you have your heart set on growing impatiens, look for New Guinea impatiens or some of the other strains that have a high resistance to the disease. The Sunpatiens, Fanfare, Divine, Celebration and Celebrette series of impatiens are all resistent. While there are fungicides on the market that will control the disease, extreme vigilance (and frequent treatment) is required. Because of this, we feel that attempting to grow many varieties of impatiens will prove to be problematic for most people. We think the time has come to explore other options for summer color. After all, growing plants is supposed to be pleasant, right? Here are ideas for some great floral alternatives: • Begonias Great color can be achieved with striking foliage, too: • Ipomea Happy planting! |
 |
|
William Cowper once wrote the now famous words, "Variety is the spice of life." This couldn't be truer in the garden. Nothing spices up a garden like plants with variegated foliage. Use too many and they'll make you dizzy. But placed in the background or strategically planted in the midst of the garden, variegated foliage can bring out the best in all of your plants. Variegated plants come in a myriad of shapes and shades. From bold to subtle, there's something for every gardener's personal tastes. If it's a tree you're looking for, nothing steals the show like the 'Flamingo' box elder. It can be the centerpiece to build your entire garden around. Many variegated plants make excellent hedges. Instead of hiding in the background, they provide a great starting point to planning a garden. Consider variegated English boxwood, 'Red Twig' dogwood, 'Gilt Edge' silverberry, euonymus, variegated English holly, variegated kohuhu, variegated mock orange, dappled willow or weigela. Many of these plants also look wonderful when planted individually to bring out a corner or become a focal point on a mound or garden island. If a hedge is not your cup of tea but you still want to hide some of your fence line, a variegated bower vine or variegated potato vine will do an excellent job. For bursts of color and interest throughout your garden, consider variegated varieties of abelias, daylilies, licorice plants, phlox, mock orange, sage, stonecrop, weigela, New Zealand flax and ornamental grasses. If your garden has shaded areas, don't worry. There are many great selections for areas with less sunlight. Many popular variegated plants prefer shade or partial shade. No matter what your garden setting is, variegated plants not only look great but also add interest. We have a large selection of plants with unique foliage and variegated colors. Stop by soon and see the beauty of these plants in person. You wont be able to resist them! |
 |
|
What does "double digging" the soil mean? Answer: Double digging is an old garden technique of amending the soil in a flower or vegetable garden that is still as effective today as it was back in medieval Europe. But be forewarned: double digging is a lot of work. In fact, just thinking about it makes us break out in a sweat. The term comes from "double the depth" of a normal spade or shovel blade--hence double-digging. You will also be adding one third of the depth of your spade or shovel in soil amendment to the entire garden you are digging in. To get started, dig out the topsoil to the depth of your spade or shovel in a trench one spade wide along one end of your bed and set aside in a wheelbarrow or on a tarp. Turn, break and aerate the next spade depth and width. Work in one third by volume of soil amendment. Blend together with turned-over soil and fill in the first trench. Now repeat the process with another trench. Blend that soil with more soil amendment, and transfer to the previous trench. At the end of the bed, place the topsoil from the wheelbarrow or tarp over the last section, add amendment, and mix it in. Make sure to remove any rocks or old pieces of roots as you fill in each trench. Now--if you haven't collapsed yet--go ahead and plant your flowers. Better yet, plant a new crop of veggies. You'll need the vitamins to help you recover from the exhaustion! More seriously--if you have poor soil, double-digging is one of the most effective ways to improve the soil to a good depth, one that will allow your plant roots plenty of room to grow. Rototilling and such can help too--but it doesn't improve much but the top layer of soil. Double-digging may be labor-intensive, but it works. |

|
What You Need:
|
|
Step by Step:
|
 click here for a printer friendly version of this page
 |
Written content © Garden Partners LLC, or respective authors. All Rights Reserved. Privacy Policy. All written content contained in this site is protected by United States copyright law and may not be reproduced, distributed, transmitted, displayed, published, or broadcast without prior written permission of Garden Partners, LLC. You may not alter or remove any trademark, copyright or other notice from copies of the content. |


